For those of you that don't know, I have been doing the Digital Nomad thing for a while now. I left my base in the UK in April 2018, and have been traveling in Asia. Apart from the odd business trip back to Europe, I have spent 4 months in India, 1 month in Sri Lanka, and am now finishing up a month in the Maldives before heading to Malaysia.
For reasons that are beyond me, unfortunately there are websites which have decided to limit their access to country specific IP addresses. Because, I guess... security?!?

Now, I am not talking about trying to access BBC iPlayer or Netflix UK content from abroad (although if that's your thing, you can), I am talking about trying to use various UK websites that you need for generally getting stuff done, think banking and government services.
So then, without getting into some complex IP spoofing stuff, our quickest solution is likely to use a VPN with an exit node based in the UK. Now whilst there are a huge number of VPN services out there, they all seem to charge a monthly subscription, considering this is something I will likely use for just a few days of the year that seems excessive. If you are looking for a paid managed VPN service, I can recommend BlackVPN whom I used in 2011 when I lived in Germany for almost a year.
These days there are many cloud providers that will lease you compute and/or storage resources by the hour. We can create an instance, a fancy virtual machine, in the cloud that runs a VPN server. We will have to pay for the machines disk storage in perpetuity until we no longer want a VPN service, but we only have to pay for the compute CPU hours for when the instance is running, so the trick is to start and stop the instance as and when we need the VPN so as to keep the cost low.
Quick setup of an EC2 VPN
I am going to assume that you have already signed up for an AWS EC2 account and can access the EC2 dashboard.
We are going to setup an instance running TurnKey OpenVPN with a static IP address. By no way should the setup in this article be considered secure, or suitable for anything other than basic personal use.
Firstly you need to decide on the AWS region that you want your VPN exit node to be in, I want mine to be in the UK, so I chose EU (London).

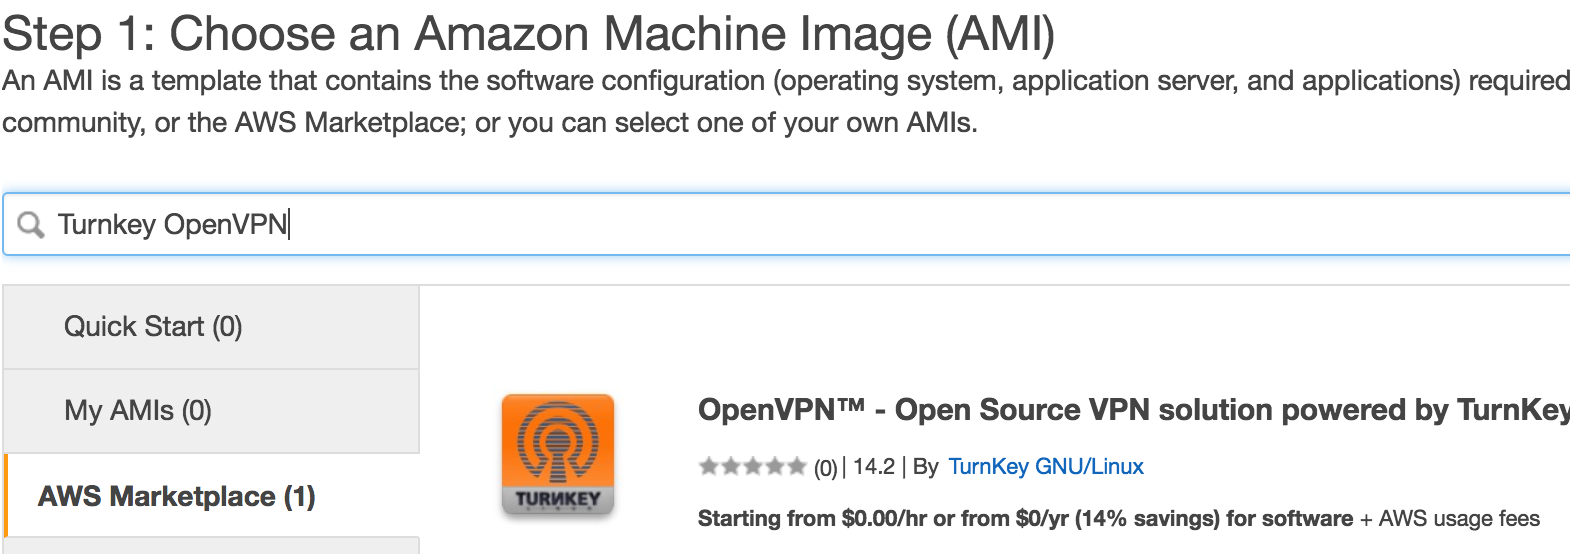
Next we click the Launch Instance button, choose AWS Marketplace, search for TurnKey OpenVPN and click the Select button:
Next we need to choose the instance type, if we choose a nano instance then there is no charge for using the OpenVPN software itself, just the AWS EC2 charges for the compute and storage. As this is a personal VPN, we don't need much in the way of CPU or memory, so the nano instance is just fine. I have had two concurrent VPN users without issue, and you can likely have more.
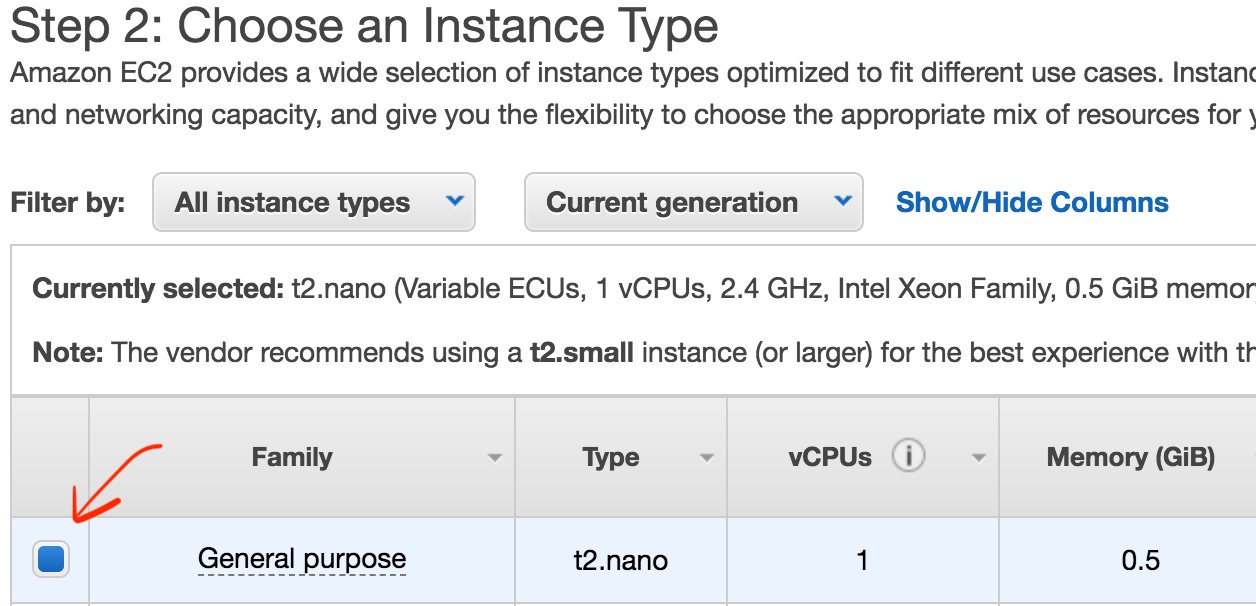
After choosing the Instance Type, click the Next: Configure Instance Details button, you don't need to make any changes in Step 3: Configure Instance Details, just click the Next: Add Storage button.
In Step 4: Add Storage, you can accept the defaults of 10 GiB of Magnetic disk if you like, I actually switched to 10 GiB of General Purpose SSD (gp2) as I want the instance to start up quickly. Click the Next: Add Tags button.
In Step 5: Add Tags you can just click the Next: Configure Security Group button.
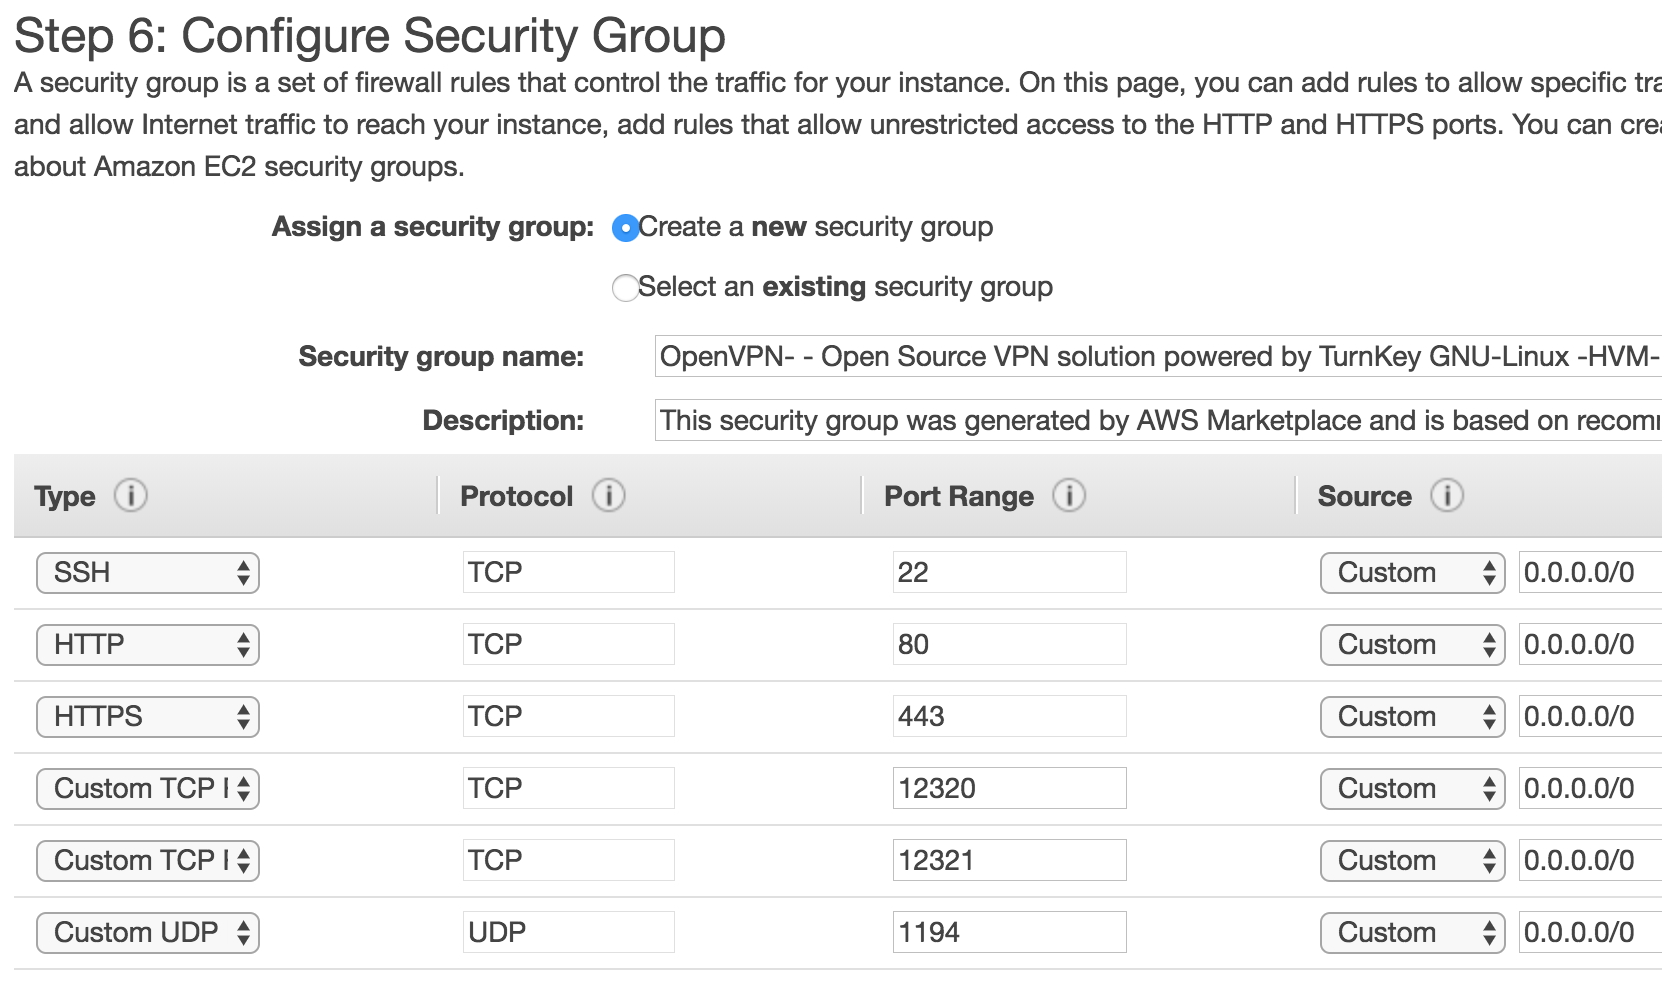
In Step 6: Configure Security Group you should accept the defaults where it will create a new Security group for the OpenVPN, finally click the Review and Launch button, and then confirm by clicking the Launch button.
After launching your instance return to the EC2 Dashboard, and examine the Instances, you should see your new instance, and you can give it a meaningful name, I called mine TurnKey OpenVPN (UK):

Now we are going to allocate and assign a publicly accessible IP address to our VPN so that we can always access it from our client (laptop etc) using the same IP address. NOTE: There is also a small charge on EC2 for leasing IP address.
In the menu on the left of the EC2 Dashboard, go to the Elastic IPs view under Network & Security, click the Allocate new address button, accept the defaults, and click the Allocate button.
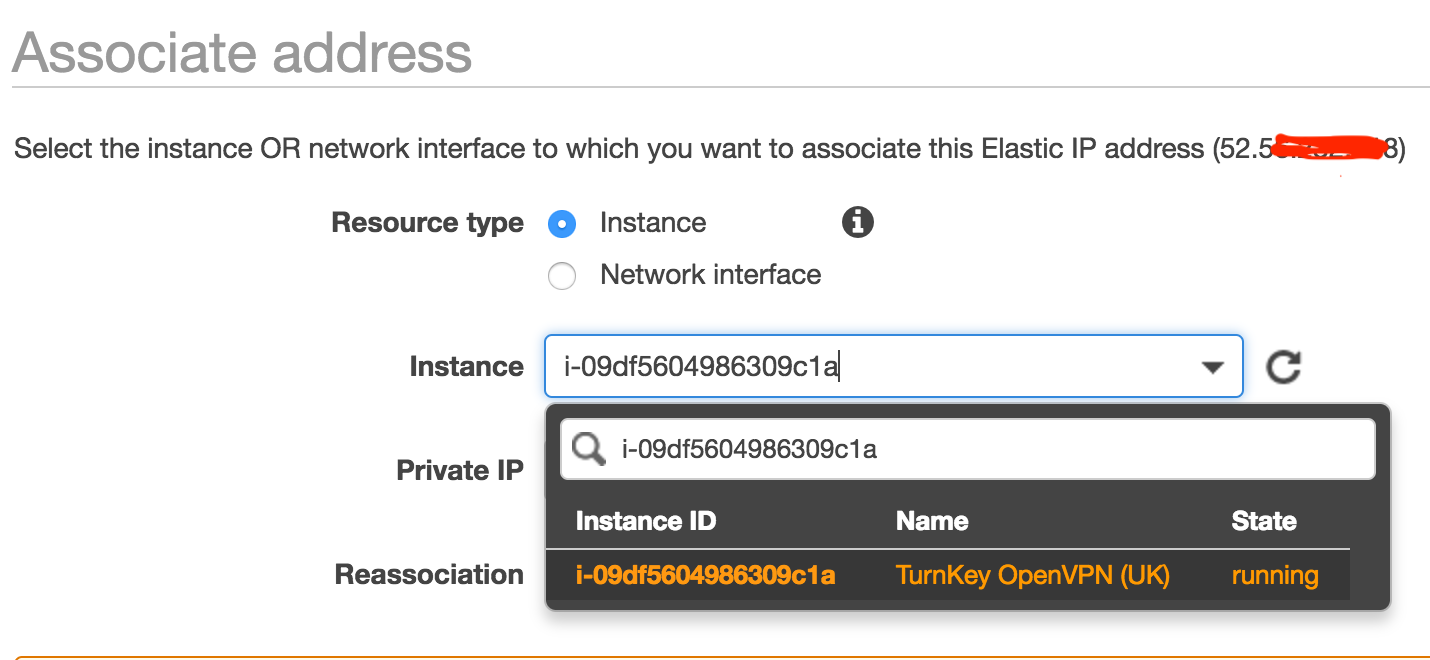
You now need to right-click on your Elastic IP and click Associate address in the popup context menu. From here choose your VPN instance, and then click the Associate button.
Make a note of your Elastic IP address as you will need it later for configuring TurnKey OpenVPN. For the remainder of this article, I won't use my own VPN server's IP address, instead I will use the stand-in address 123.123.123.123.
Our VPN server in EC2 is now up and running :-)
Configuring TurnKey OpenVPN
Before we can use our VPN, we first need to configure the TurnKey OpenVPN server. This only needs to be done once.
We need to SSH into our instance:
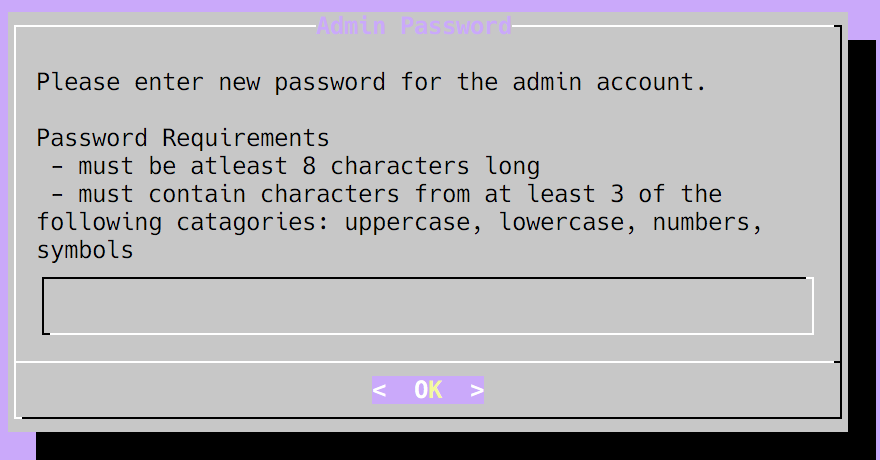
$ ssh -i your-ec2-key.pem admin@123.123.123.123This will then present us with a guided setup menu, if you are not familiar with such curses driven console menus, then the TAB key on your keyboard will move the cursor between fields and buttons, and ENTER will click a button. Firstly you must set a password for your admin user, this is used for the web admin console etc.:
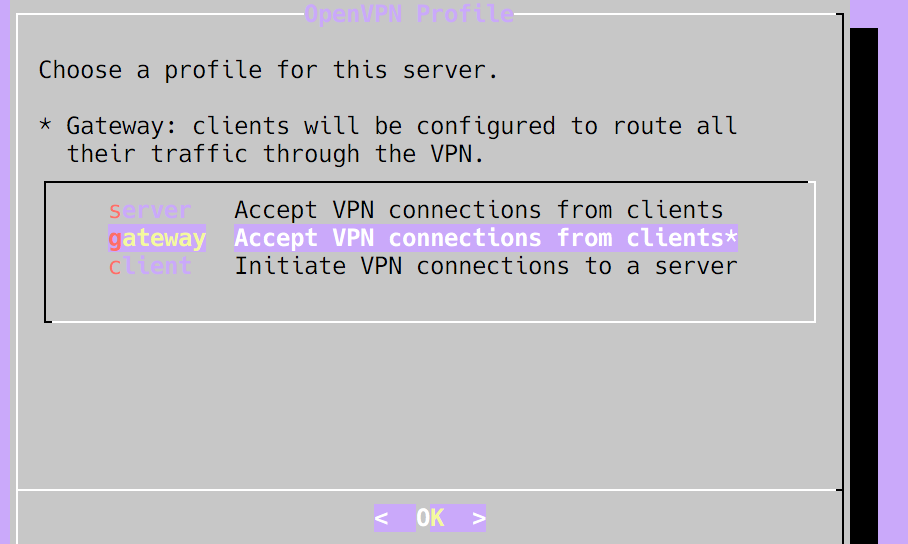
Next you must choose a profile, this guides the initial setup of the OpenVPN software itself, for the purposes outlined at the start of this article, I recommend selecting the gateway profile:
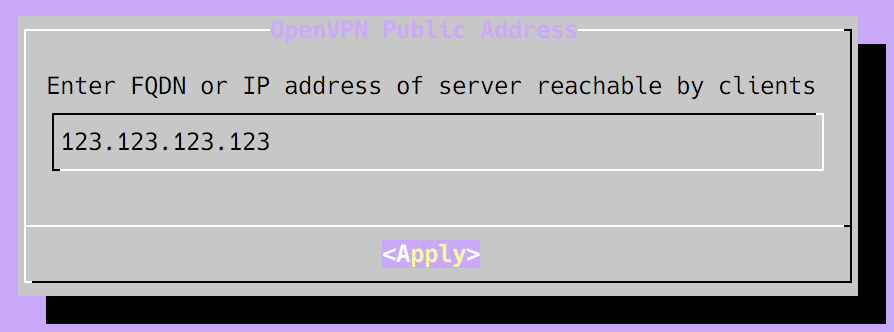
You then need to set the OpenVPN Email address, as this is just a personal server it is not important, you can keep the default of admin@example.com. Next we have to set the OpenVPN Public Address it is important that you set this to your Elastic IP that you configured earlier:
When asked for the OpenVPN Virtual Subnet unless you know that this clashes with the IP subnet used on your clients network, you can just accept the default.
When prompted to Initialize Hub Services, whether you do this is up to you, but you can also skip it as I did.
For the System Notifications and Critical Security Alerts you can either enter the email address root@localhost or enter your own email address. I chose the former.
When prompted to install Security Updates, you should choose Install. After updating if you are prompted to reboot, you should so that any kernel updates take effect.
Once the configuration (and possible reboot) have completed, our TurnKey OpenVPN server is now configured and ready for us.
Setting up the VPN Client
To be able to connect to our VPN server, our VPN client (our laptop, mobile phone, or whatever) needs credentials for connecting to our VPN server.
I am not going to cover every client option here, and please don't ask me for help with any specific clients! Personally I have been using Tunnelblick for macOS for many years and find it to be perfect, i.e. simple, and unobtrusive.
Assuming your client, like Tunnelblick, can understand an Open VPN client configuration file, then here is how you generate one from your TurnKey Open VPN server:
-
Connect to your instance via SSH:
$ ssh -i your-ec2-key.pem admin@123.123.123.123 -
Run the following command to generate a client configuration for yourself:
$ sudo openvpn-addclient your-name your@email-address.com -
You can then create a temporary link for downloading your client configuration:
$ sudo /var/www/openvpn/bin/addprofile your-name
The final step (3), will then report to you a URL to a temporary page such as: https://123.123.123.123/profiles/12edc691f052436eb305e777003a12ea4dc19a46/. When you open this page in your web browser, you can download the OpenVPN client config file, there is also a QR code for mobile apps which can accept their configuration in that manner.
On a Mac with Tunnelblick installed it is then just a matter of double-clicking on the dowloaded .ovpn file to have it configured.
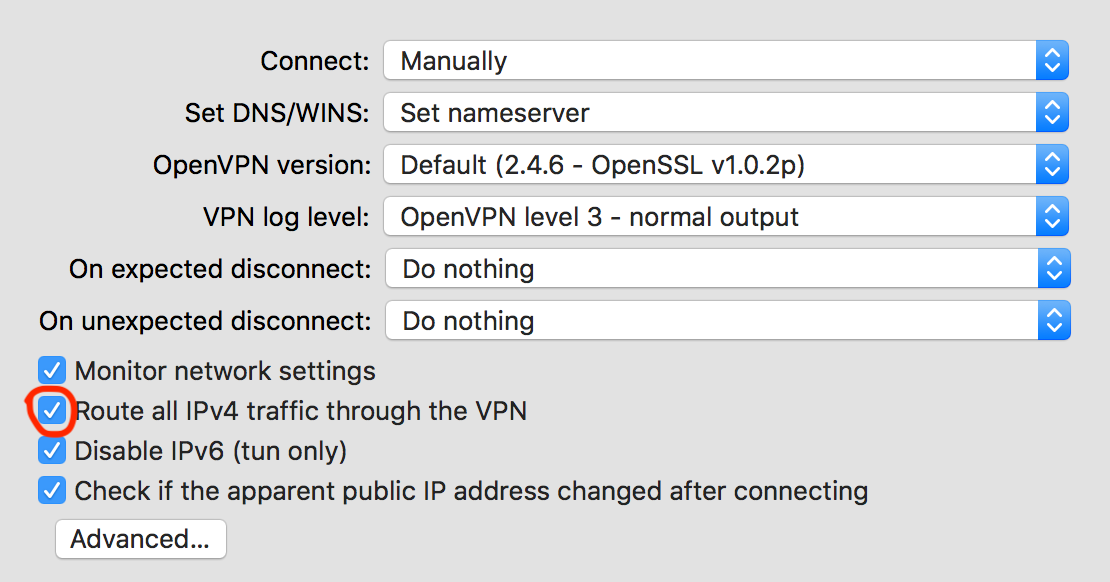
One thing worth mentioning is that in Tunnelblick, by default, not all traffic is sent through your VPN connection. If you want to enable that, and I did, you need to visit the VPN Details and then Settings dialog for your VPN connection, and click the Route all IPv4 traffic through the VPN checkbox:
Your now ready to connect, and use your VPN :-)
On Demand!
Right then, the purpose of setting this up was so that I could use my VPN server on demand, therefore only paying for the compute hours that I actually use.
This requires some personal discipline! You need to start your EC2 instance each time you want to use your VPN, and then stop it when you have finished with the VPN (so that you are not billed for unused hours).

So... What Does It Cost?
- Compute
Each region is different, but forEU (London)at2.nanoinstance at the time of writing is$0.0066per hour. So if I overestimate, I might use this for 2 days in a month, lets say during the working day (8 hours), then the cost is2 * 8 * $0.0066=$0.1056per month. - Storage
There is an AWS Free Tier which includes 30GB of storage, if you qualify for that, then you won't pay for storage for your VPN instance. Unfortunately, I have a bunch of other things happening in AWS and so I have exceeded the Free Tier.
At the time of writing for theEU (London)region, EBS General Purpose SSD is$0.116per-GB month. I am using 10GB for my TurnKey OpenVPN instance, so the cost is10 * $0.116=$1.16per month. - IP Address
Interestingly Amazon only charges for single Elastic IP addresses when they are not associated with a running instance. In terms of our setup, our Elastic IP is actually going to be unused most of the time as our instance won't be running.
At the time of writing for theEU (London)region, an Elastic IP address which is unused costs,$0.005per hour. We estimated that we would only be using our instance about 16 hours per month. Based on an average month of 730 hours, we can calculate the cost as(730 - 16) * $0.005=$3.57per month. - Data Transfer
At the time of writing for theEU (London)region, data transfer into EC2 from the Internet is free.
Data transfer out from EC2 to the Internet is free for upto 1GB / month, and then charged at$0.09per GB-Month, upto the next ~10 TB. For my use, it is very unlikely I will exceed 1GB / month.
So in total for months where we use the VPN the cost is about $4.84 per month. Not bad! :-)
If we con't use the VPN for a month, we only pay the unused Elastic IP and storage costs, which would work out as approximately (730 * $0.005) + (10 * $0.116) = $4.81. So not much in it either way really.
Total cost <$ 5 / month.
Useful Notes
- If you get disconnected from your SSH session when running the initial setup of TurnKey OpenVPN, you can relaunch it after reconnecting with SSH by running
sudo turnkey-init. - Once the initial setup via SSH is done there is a web interface available at http://123.123.123.123/.