tldr; Setting up the Hetzner Server
Background
Until recently, apart from a bit of AWS EC2 here and there, I had predominantly rented dedicated servers from SoYouStart.com. When compared to renting CPU-Hours for Cloud machines from AWS, I find that for multi-year projects that only require small amounts of infrastructure, there are significant cost savings to be made by renting dedicated servers and virtualising them with KVM.
I have been a happy customer of SoYouStart (who are part of the much larger OVH) for at least 5 years now, their support has always been prompt, and the service itself has been very reliable. SoYouStart run a kind of batch sales process, whereby every so often they release a new batch of server configurations and make them available for purchase, however once they are all sold, the customer has to wait an indeterminate amount of time for new stock to become available. Recently, I needed to purchase some additional servers and network storage, having waited about 3 weeks, the server configurations that I wanted were still not in stock! My options were to either, wait longer and hope that some became available, order several smaller configurations and split the workload (but increase the administrative overhead and costs), or look around at other suppliers.
After a bit of Googling, I stumbled upon the Hetzner Server Auction. The auction is literally a searchable listing of hundreds of leasable severs that are available in the Data Centre's of Hetzner. Unlike SoYouStart, there is a lot more inventory, and a lot more choice between configurations. With SoYouStart I was hoping to lease several Xeon E5-1650v3's with 64GB RAM, and 2x480GB SSD at a cost of £907.08 / year each. At Hetzner I was able to find Xeon E5-1650v3's with 128GB RAM, and 2x480GB SSD at a cost of €821.40 / year (~ £717.02). So by moving from SoYouStart to Hetzner, not only could I double the amount of RAM (useful for running even more Virtual Machines), but I could also save the best part of £200 / server / year... DONE!
Setting up the Hetzner Server
When you order your server, you provide an SSH key for later connecting to it. When your order is completed your server is booted in rescue mode, and you can connect to it via SSH with your key as the root user. From here you can install an Operating System of your choosing by running the command: installimage.
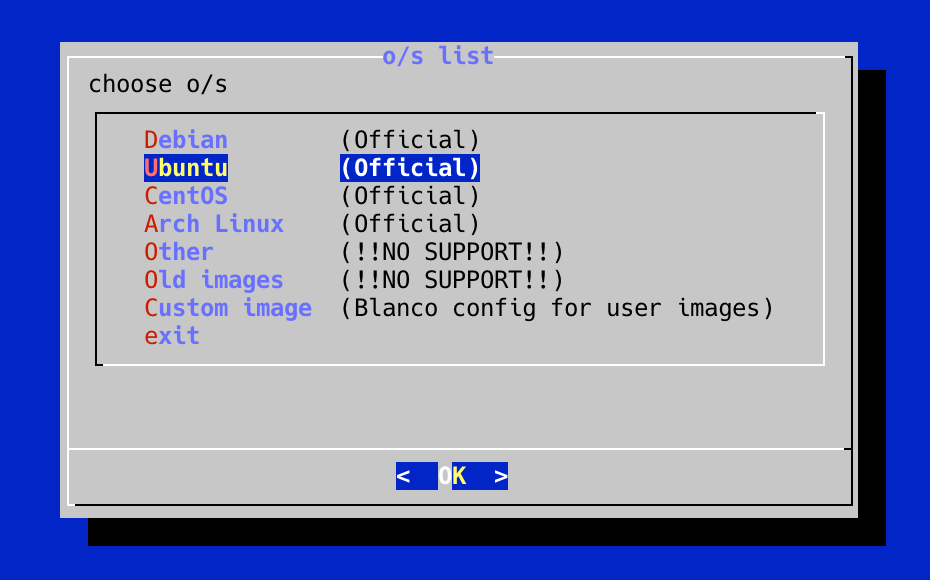
On the next page you are offered a choice of Ubuntu versions, I went with 19.04 (the latest stable release at the time of writing). The following page allows you to configure the Operating System, I modified the hostname, the size of the swap partition (12GB), and changed the filesystem of the root partition from ext4 to XFS. I chose XFS because it is known to be good with larger files, as I will be using this machine for virtualisation, we will have several large virtual machine files. Once the installation completes we can restart our server into our new Ubuntu install by running the command reboot.
Basic Server Configuration
Once the server has rebooted (takes a couple of minutes), you then login to your new Ubuntu system as the root user with your key via SSH.
Firstly, we should update any outdated packages:
apt-get update
apt-get -y dist-upgrade
shutdown -r now
I perform the shutdown and reboot at the end, so that the system reboots into the newly updated kernel that apt-get installed for us. Once the machine has rebooted, we can again connect via SSH.
I feel uncomfortable with being able to access the server remotely using the root account. It seems to me that a better approach would be for us to create an administrative account, and disable SSH access for the root user.
I created the new account aperson; Of course you should use your desired username instead of aperson. I also copied over the SSH key that we are using to connect via SSH as root, so that we can use the same key to connect via SSH as aperson:
adduser aperson
usermod -a -G sudo aperson
mkdir /home/aperson/.ssh
chown aperson:aperson /home/aperson/.ssh
chmod 700 /home/aperson/.ssh
cp /root/.ssh/authorized_keys /home/aperson/.ssh/
chown aperson:aperson /home/aperson/.ssh/authorized_keys
chmod 644 /home/aperson/.ssh/authorized_keys
You should now check that you can connect remotely to the server over SSH as the user aperson with your key, and that once you have logged in as that user, you can run sudo su - to change to the root user.
Assuming that went well, we will now disable remote root access via SSH. Simply edit the file: /etc/ssh/sshd_config and make sure that any line starting PermitRootLogin is changed to the line PermitRootLogin no. Then reload the SSH config changes by running: systemctl restart sshd. Disconnect your SSH session, and check that you can no longer connect to the server via SSH as the root user.
Establish a new SSH session to the server as aperson. We will now install some software packages that we will need later:
- Screen
Useful for multiplexing the terminal and keeping sessions running after we disconnect. - Mosh
This is really just a better SSH for high-latency environments. I spend a lot of time travelling and my internet connection is not always reliable. - KVM
Kernel Virtual Machine, this is out server virtualisation platform. - uvtool
Ubuntu provide minimal cloud images for virtualisation.uvtoolallows us to manage these whilst also providing a simpler interface to KVM. - UFW
Uncomplicated Firewall. Every server should at least have a host firewall!
sudo apt-get -y install screen
sudo apt-get -y install mosh
sudo apt-get -y install qemu-kvm libvirt-daemon-system libvirt-clients bridge-utils
sudo apt-get -y install uvtool
sudo apt-get -y install ufw
We should remember to add our administrative user to the libvirt group if we wish to manage VMs (Virtual Machines): sudo usermod -a -G libvirt aperson.
Finally, we should configure and enable the firewall:
sudo ufw allow OpenSSH
sudo ufw allow mosh
sudo systemctl enable ufw
sudo systemctl start ufw
sudo ufw enable
Conclusion
We now have a server happily humming along in the Hetzner Data Centre that is ready to run a bunch of Virtual Machines for us.
So far I have been impressed with Hetzner, their web-based control panel may look basic but it offers greater functionality than SoYouStart. Their rescue system for configuring servers is also excellent.
I have already had to call upon their support to enable the remote physical console (confusingly also called a KVM) for the server, after I made a mistake in the network configuration and locked myself out from SSH access. In that instance they responded within minutes, and everything worked well*. As a bonus, remote console access via the KVM is free at Hetzner for upto 3 hours at a time, whereas SoYouStart charge £26.40 / day.
It is too early to tell how the service and performance at Hetzner will compare with SoYouStart, but I am looking forward to finding out.
* When connecting to the remote console KVM of the server. It is worth remembering that this is a server in a Germany, and so the KVM is configured with a German keyboard layout! As such, if you don't have a German keyboard, you will need to type on your keyboard as though you had a German keyboard layout.